

Following on from the drag-and-drop prefabs I was previously looking at, I’ve recently been working on a process for swapping Unity’s skinned meshes at runtime. At the moment I’m using it just to change costumes on a single character, but it should come in handy later on for sharing animation clips between different background NPCs etc. as well…
I start off with a single, basic mesh for my character which is rigged and weighted in Softimage, before exporting as an .FBX the mesh is made a child of the same model null as the shadow rig.
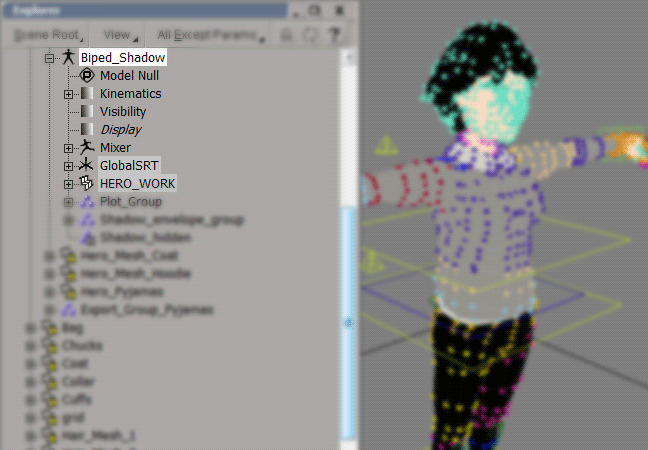
Once imported into Unity I set the Animation Type to Humanoid and create / configure the Avatar.

Under the highlighted .FBX you can see the rig, the Skinned Mesh Renderer component, the Mesh component and finally the Avatar. All we’re concerned with here are the bits relating to the Mesh. If you click on the Skinned Mesh Renderer you can find reference to the Mesh itself near the bottom.
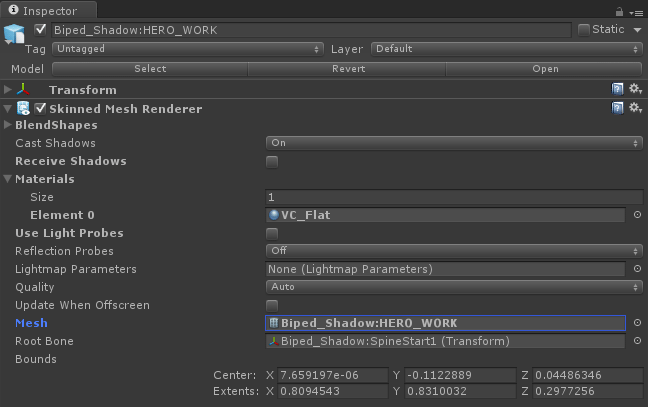
This is the element we want to swap out during runtime while keeping everything else in place; luckily, it’s pretty straightforward to set this up with Playmaker. With the Playmaker editor open, drag the Skinned Mesh Renderer component from your scene on to the State window, pick Set Property and then sharedMesh / Mesh from the drop-down menu.
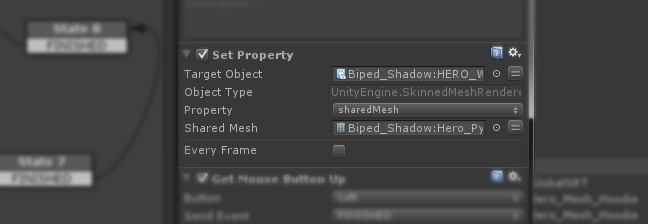
You can now drag any other mesh component into this property box and have it replace the current one. Any mesh will work to some degree, in this case, swapping out different outfits for a character, it’s important to make sure the meshes match in terms of scale and weights with regard to the rig. The method I’m using at the moment is to work on top of my base mesh, modelling any additional elements and repainting weight and vertex colour maps as necessary, but initially keeping everything separate. When I’m happy, I merge the meshes, including all the map data, into a new separate single mesh. I then parent and export this in exactly the same way as the base mesh previously, including the shadow rig. It comes into Unity set up exactly as before, with the Skinned Mesh Renderer etc. and all I have to do is swap the mesh elements around as required…

It’s possible that some of these steps aren’t strictly necessary to get the same results, I’m sure there’s a way to import just the mesh for example, but I ran into a few issues with weight maps not working and conflicting parenting/transforms and this seemed to sort those out!
As always, comments, crits and corrections are all welcome.